
I have been interested in QRP solutions for a long time. Of course, I do not avoid QRO, which like QRP gives me pleasure. Long time ago I built TRX Libra on the 80-meter range, unfortunately I did not have the desire to fully run it. Now I have found a very interesting and modern QRP CW radio project, which has very good (as for KIT) parameters and many “splashbacks” present in modern TRXs of well-known brands.
 Returning to the transceiver itself – there are available kits for the 80, 60, 40, 30, 20 and 17m bands. The main features of the QCX TRX:
– Output power: 3.8W for 11.9V and 4.2W for 12.4V. Apparently at a higher voltage can be achieved and 5W (transistors do not require cooling, they are just cool)
– PA is implemented in the “E” class, which brings with it a small power consumption when transmitting, and thus good system efficiency. In my case for 4.2W the current consumption is 450mA (the receiving is 110-120mA)
– 7-element Low-Pass filter
– S-meter
– VFO A/B, Split
– Built-in straight key
– Built-in keyer, which is easy to use, has a memory for a lot of characters
– Presentation of transmitted characters during transmission and decoding Morse code. Very useful, not only for beginners
– Built-in CW filter with 200Hz bandwidth
– Customizable CW offset, as well as configurable frequency and volume of sidetone
– Built-in voltmeter, RF power, frequency meter, signal generator
– Has RIT, XIT functions. The menu is quite extensive as for Atmega 328
– The ability to change the firmware
– Tuning takes place from the menu through a graphical representation of the settings
– Operates with 9V battery, giving approx. 1 W (working from 7 to 16V)
– Full QSK and Semi QSK (with me something from Semi QSK works strangely)
– TRX is prepared for WSPR operation, you can buy a GPS module (exact time and position).
The most difficult are 4 toroidal coils to wind up, but only one of them is complicated. You do not even need a multimeter to start up. It is worth mentioning that the KIT assembly instruction is so written that it is really difficult to assemble it badly. As Hans G0UPL (the creator of the solution) said, only experienced in submitting KITs, they present problems with starting, because they do not read the assembly instructions.
 The housing can be printed, there are files of ready housings. Making a casing yourself is not trivial because the display has 2×20 characters above the main board. I ordered the original housing for my version, unfortunately the cost of housing is almost the price of TRX HI.
A group of people was formed around the project, exchanging ideas. I will add that the TRX QCS (or all band CW/SSB) version is under dvelopment.
I have not yet managed to mount the QCX in the housing. I made myself doing QSOs and for the first 2 days I managed to do about 30 stations. TRX works sensational (a small demonstration on the video, unfortunately I set the camera wrong and I can not see decoding the CW characters). It’s small, handy, cheap – what to write, you have to try it yourself. The design is thought-out for working on CW, everything is intuitive. Personally, I miss the PTT output to connect to PA HI.
73 de SQ5JUP,
Piotr
In January 2021, QRP Labs launched the new QCX-mini transceiver, which is a miniature version of the above-described QCX transceiver. The new QCX-mini measures only 95x63x25 mm and weighs just over 200 g. The schematic and parameters are similar to the QCX, but new options (eg PTT) have been added. The company offers an optional very durable and elegant housing made of black anodized aluminum. The whole structure is two-board: one board with the main circuit and connectors, the other board with the LCD display panel.
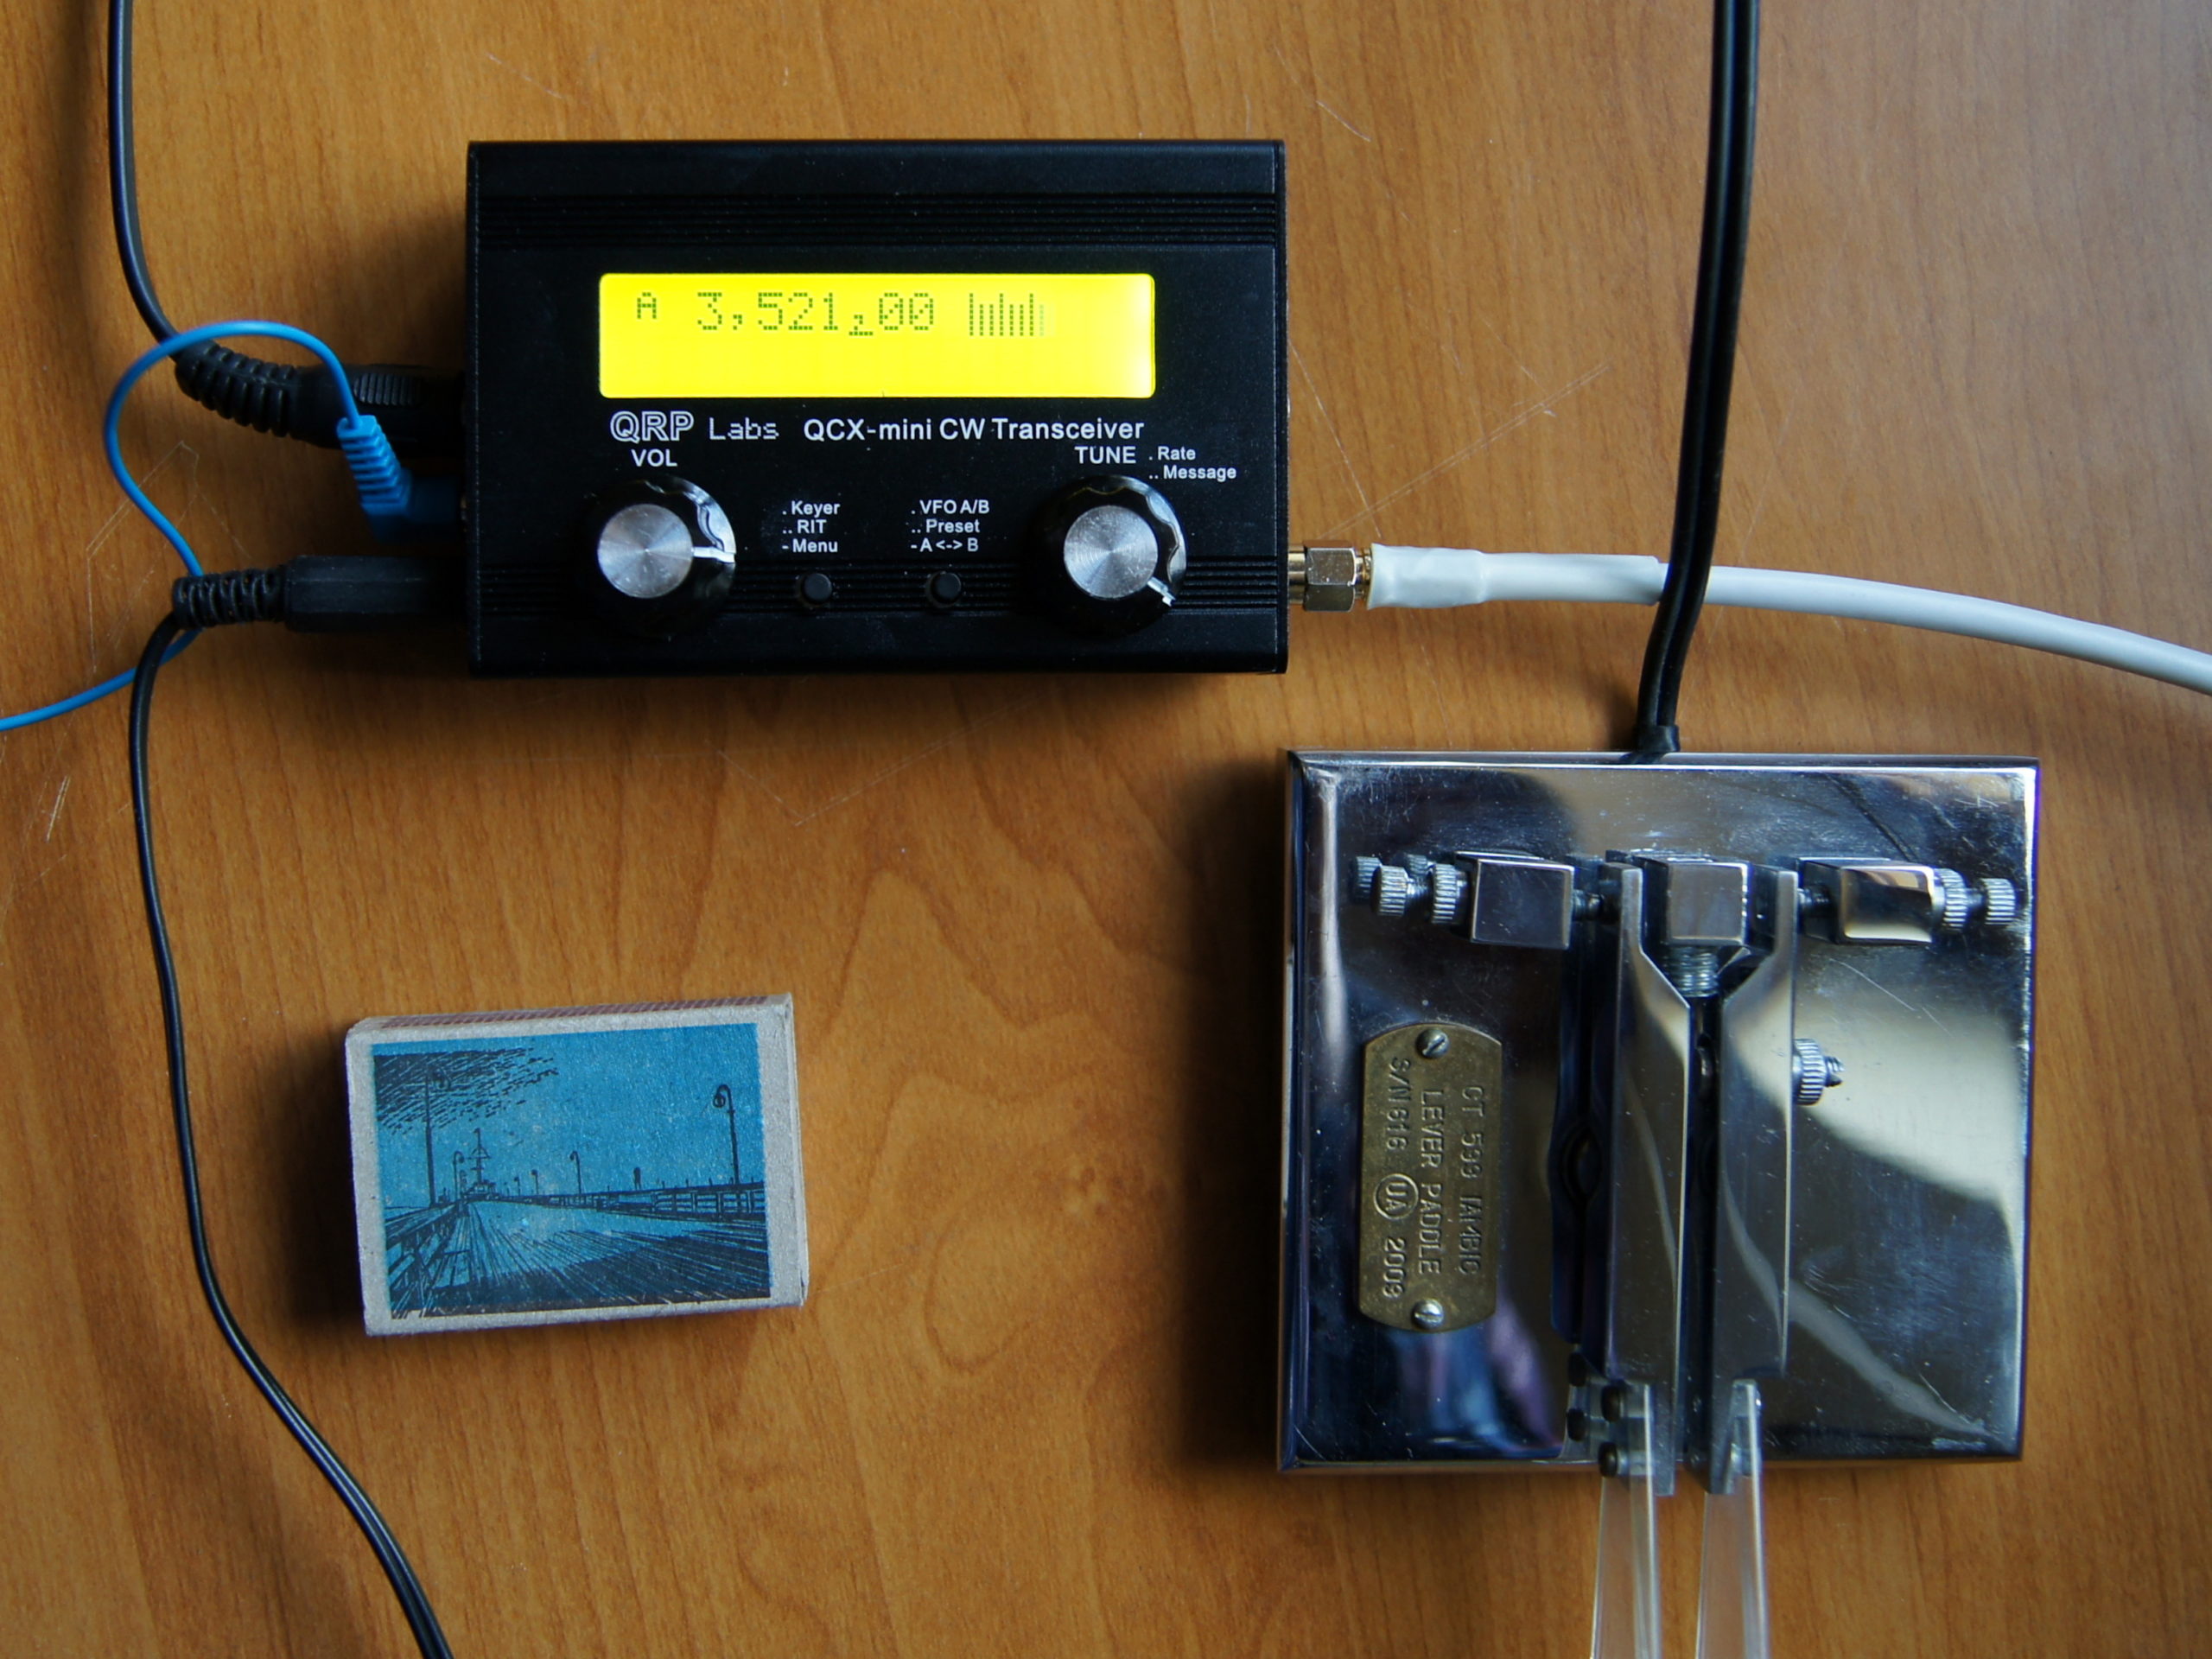 For the construction of the CW transceiver, apart from the basic assembly tools, no measuring devices are needed. Courtesy of Andrzej SP5AHT from the Świat Radio magazine, I received a QCX-mini set for 80 m band for assembly and testing. Thanks to the excellent instruction, the assembly of the transceiver is a real pleasure (maybe except for winding the transformer…). There was one minor bug in the included kit – wrong capacitor. Before assembly, it is worth using a magnifying glass to check the assembly on PCBs. In my case, one of the SMD resistors was cracked. After screwing the boards, you can proceed to the adjustments described in detail. If the assembly was correct, it will take a few minutes and you can start working in the air. The operation is simple and intuitive, described in detail in the comprehensive manual.
The effects of the QCX-mini transceiver were surprisingly good. The receiver sensitivity, unwanted sideband attenuation and selectivity was excellent. For a 13.8V power supply, the power on an artificial 50 ohm load was measured at 4.83W with an efficiency of 83%. It was possible to reach distant stations without any problems.
The kit also includes a small PCB that allows you to convert the QCX-mini into a uSDX transceiver (see also on our website: https://hf5l.pl/en/transceiver-usdx-with-arduino-nano/ ). The description of the conversion has been published by DL2MAN. The decision to modify should be made BEFORE starting the assembly. It is a bit risky – assembling the SSB version requires not only the knowledge of how to reprogram the microcontroller, but also the skills of soldering and replacing very small SMD components, type 0603.
Mirek SP5GNI
Number of Comments: 3
A very nice toy!
The beacon option is great, after running you can check where you are heard, and where the conditions are. I think I’ll do one.
Miro SP5GNI
how do i get one for 40m? and 10 m cw
From http://qrp-labs.com/qcx.html :
QCX is available for 80, 60, 40, 30, 20 or 17m bands.
Miro SP5GNI